Wednesday, June 1, 2011

Homemade Restaurant Style Salsa


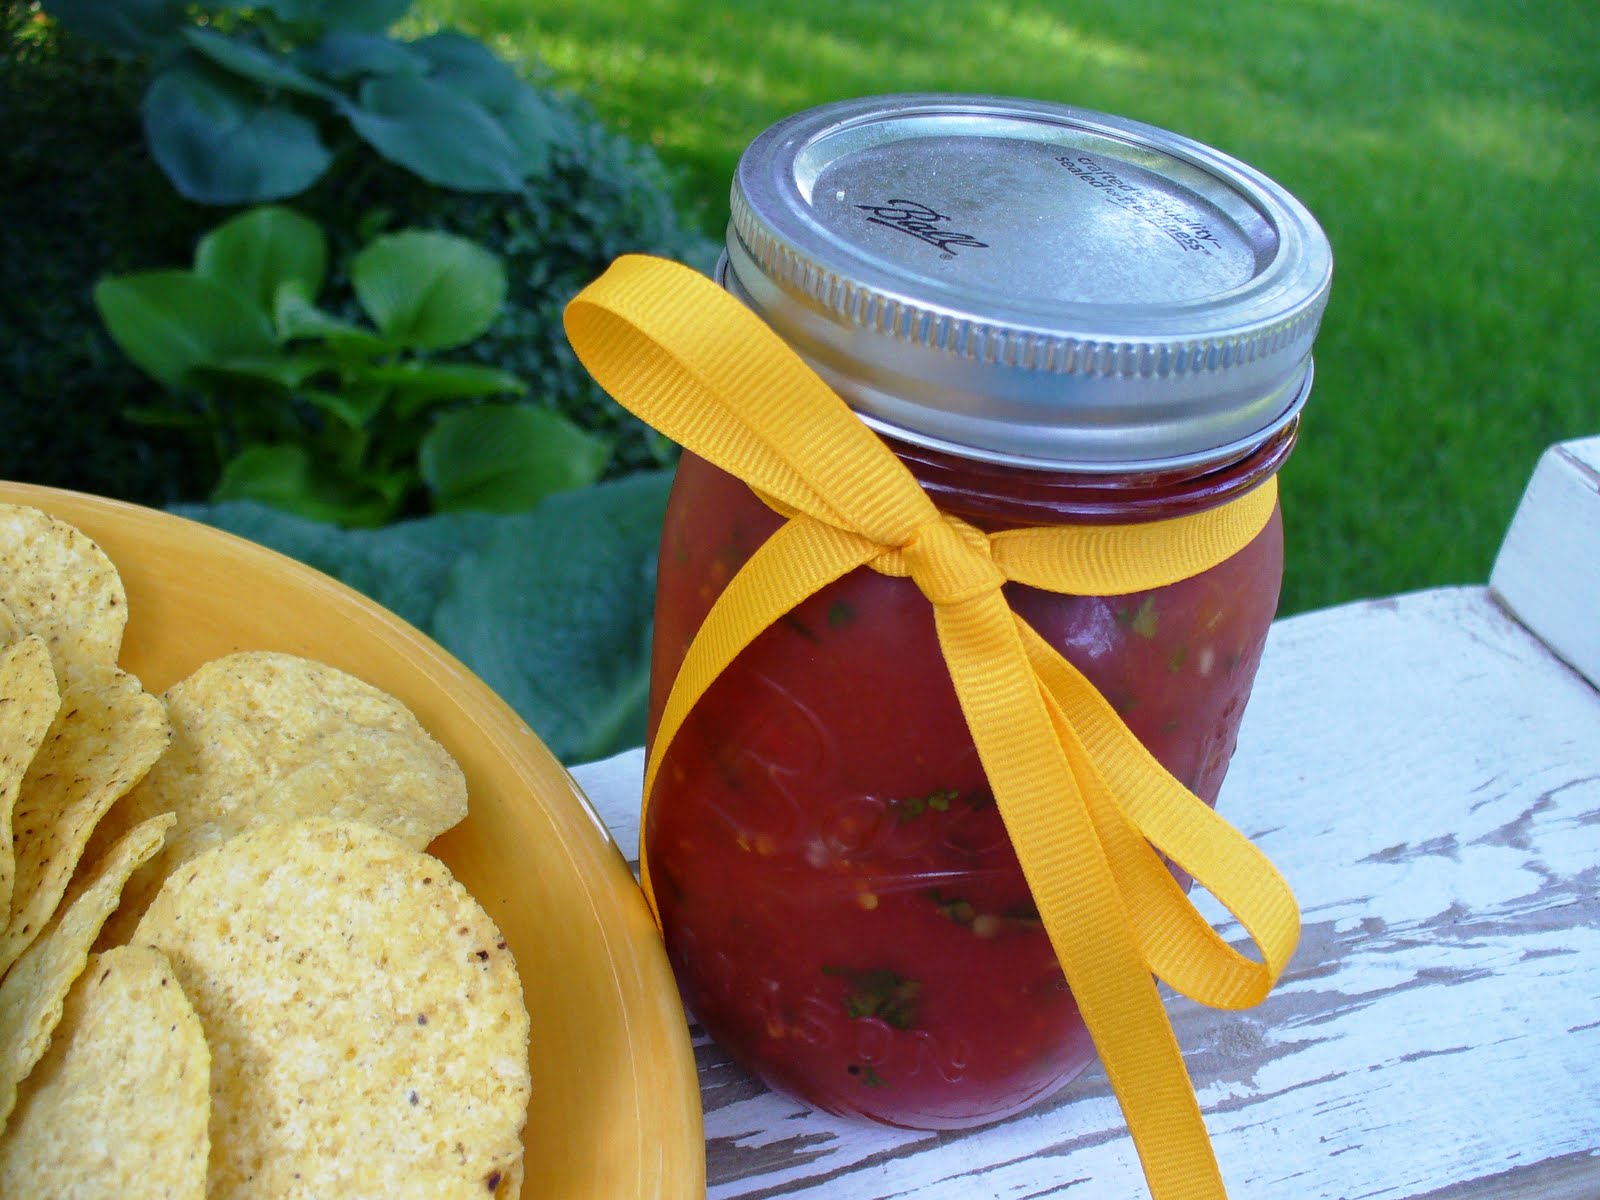
This salsa is so good and it tastes just like the salsa that you get at authentic Mexican restaurants served with tortilla chips. It is full of fresh flavors; it consists of  canned whole tomatoes, rotel (tomatoes and chiles), fresh onion, garlic, jalapeno, and cilantro, fresh lime juice, salt, pepper, and cumin. It also couldn't be easier to make! All you do is throw everything into a food processor and pulse until your desired consistency; you can make it as chunky or as smooth as you like. Enjoy.

Homemade Restaurant Style Salsa: (Brown Eyed Baker)
Yield: About 6 cups

  • 28-ounce can whole tomatoes (peeled) with juice
  • 2 10-ounce cans Rotel (diced tomatoes with green chiles)
  • 1/4 cup chopped onion 
  • 1 clove garlic, chopped
  • 1 jalapeno, quartered and sliced thin
  • 1/2 cup cilantro
  • Juice from 1/2 a fresh lime
  • 1/4 teaspoon salt
  • 1/4 teaspoon granulated sugar
  • 1/4 teaspoon ground cumin
Add all ingredients to a food processor. Pulse until you get desired consistency. Refrigerate for at least one hour, and serve with your favorite tortilla chips.

*Notes*: This makes a large quantity so use at least an 11-cup food processor, or work in batches. If you prefer a milder salsa, remove the seeds and membrane from the jalapeno before adding it to the food processor.


Tuesday, May 31, 2011

A Summer Treat


I don't know if there is an acual name for these delighful sweet treats, but, I am going to call them graham cracker sandwich cookies (I know, it's a pretty lame name, but I coudn't think of anything else)! And, I am sure that you have had one before because of their simplicity and tastiness. And if you have never had one, let me just tell you that graham crackers and frosting pair so well together, especially with a glass of cold milk!


These sweet treats remind me of hot summer days when I was little. My mom would make them for us to the take to the beach or on a picnic, we would eat them on vacation, and I remember always eating them while watching fireworks on the 4th of July, with blue frosting of course! I absolutely loved, loved, loved them and I still do. I really like when the graham cracker gets slighly soft from sandwiching the frosting :) These are great to make with any leftover frosting that you have, which is what I did with these. They are also a simple and fun sweet snack to whip up and kids will gobble them up, enjoy!


Graham Cracker Sandwich Cookies:

All you need is:
  • Graham Crackers
  • Your Favorite Frosting
  • Sprinkles
Break gramham cracker sheet into two halves. Frost one half with desired amount of frosting. Place the other half of the graham cracker on top to form a sandwich. Dip edges in sprinkles. Store in an airtight container (these are best eaten the day they are made).


Monday, May 30, 2011

S'more Cookie Bars


Happy Memorial Day! I have the perfect treat to kick off the start of summer, S'more Cookie Bars! I love campfire s'mores, but these bars sure step those up a bit! You have HERSHEY'S chocolate bars and marshmallow creme sandwiched between a blondie-like graham cracker cookie bar! You have to let them cool before cutting, but, I think they taste best warmed in the microwave to get the sticky, gooey, and metly effect of a s'more.     


S'more Cookie Bars: (Hershey's)

  • 1/2 cup (1 stick) butter or margarine, softened
  • 3/4 cup sugar
  • 1 egg
  • 1 teaspoon vanilla extract
  • 1-1/3 cups all-purpose flour
  • 3/4 cup graham cracker crumbs
  • 1 teaspoon baking powder
  • 1/4 teaspoon salt
  • 4 (1.55 oz. each) or 2 King Size HERSHEY'S Milk Chocolate Bars
  • 1 cup marshmallow creme (I used closer to 1-1/2 cups)
Heat oven to 350 degrees. Line a 8x8-inch baking pan with foil and spray with non-stick cooking spray.

Beat butter and sugar in a large bowl until light and fluffy. Add egg and vanilla; beat well. Stir together flour, graham cracker crumbs, baking powder, and salt; add to butter mixture, beating until blended. Press half of the dough into prepared pan.

Arrange chocolate bars over dough. Spread evenly with marshmallow creme. Scatter bits of remaining dough over marshmallow; carefully press to form a layer.

Bake 30-35 minutes or until lightly browned. Cool completely in pan on wire rack. Cut into bars.  


Tuesday, May 24, 2011

Peanut Butter & Jelly Cookies


Peanut butter and jelly sandwiches are a classic childhood favorite, packed in many lunch boxes over the years. I still love to eat PB&J's now! And what's not to love about a classic PB&J?  They are the perfect combination of creamy and salty peanut butter and sweet jelly sandwiched between two slices of soft bread. This cookie is the perfect treat for any PB&J lover. These jumbo-sized peanut butter cookies are soft and chewy and filled with a center of your favorite sweet jelly. Enjoy!   

Peanut Butter & Jelly Cookies: (peanut butter cookies adapted from Elle's New England Kitchen & idea from Giada)

  • 2 1/2 cups all purpose flour
  • 1 teaspoon baking powder
  • 1/2 teaspoon baking soda
  • 1/2 teaspoon salt
  • 3/4 butter, softened
  • 1/4 cup shortening
  • 1 cup granulated sugar, plus 1/4 cup
  • 1 cup brown sugar
  • 2 large eggs
  • 1 teaspoon vanilla extract
  • peanut butter mixture, see below
  • 1 cup peanut butter chips
  • about 1/2 cup of your favorite jam/jelly

Peanut Butter Mixture

  • 8 oz. peanut butter
  • 2 oz. (1/2 stick butter), softened
  • 2 oz. honey
Heat oven to 350 degrees. Line baking sheets with parchment paper and set aside. Make the peanut butter mixture by combining all of the ingredients. Set aside.

In a medium bowl, mix flour, baking powder, baking soda, and salt, set aside. In a standing mixer or large bowl, cream the 3/4 butter, shortening, and both sugars until light and fluffy. Add the eggs, one at a time, beating well after each addition, then add the vanilla and peanut butter mixture. Add the flour mixture by the cupful and beat at low speed until fully mixed. Stir in the peanut butter chips.

Put the remaining 1/4 of sugar in a small bowl. Form the dough into 1/4 cup-size balls and roll in sugar. Arrange 5 balls of dough, evenly apart, on prepared baking sheets. Using a round 1/4 teaspoon measure, or the thin end of a wooden spoon, make a hole in the center of each ball of dough, about 1/2 to 3/4-inch deep. Spoon about 1 teaspoon jam into each hole. Bake for 11-14 minutes until the dough has spread and the surface of the cookies are crackled. Cool for 5 minutes and transfer to a wire rack to cool completely, about 20 minutes. Serve or store in an airtight container. 


Tuesday, May 17, 2011

Homemade White Chocolate Peanut Butter


Woo hoo!!! School is finally out for the summer and I am soooo ready for a break! 


Summer is my favorite season ever! I sometimes wish that I lived somewhere where it was warm year-round, like Hawaii, oh how I would love living in a tropical place! Although, I must admit, I would miss the snow on Christmas. But anywho, what do I love about summer? I love the heat, the beautiful sunshine, sleeping with my window open and falling asleep to the sound of crickets, the fresh and delicious fruit, shorts, flip flops, summer dresses, going barefoot, summer vacations, and cookouts, and basically everything else about summer! Best of all, it means that I will have more time for baking and blogging and sharing yummy recipes with you!


I never knew that making homemade peanut butter was so easy. All you need is a few simple ingredients and a couple of minutes and you will have whipped yourself up some gourmet peanut butter with endless possibilities! You can basically add anything you want into the peanut butter mixture to create your own peanut butter concoction. You could add honey, melted milk chocolate, melted butterscotch chips, caramel, or may I suggest trying this fabulous looking Cookies and Cream Peanut Butter, from Picky Palate that I want to just dive right into! Doesn't that look delicious?!

This peanut butter is great for dipping apples and pretzals into or slathering on toast and bagels. Try it out and let me know what flavors you come up with!

Homemade White Chocolate Peanut Butter: (How Sweet It Is)
makes about 3/4 cup
  • 1 1/2 cups dry, roasted peanuts (I used salted)
  • 1 teaspoon vanilla extract
  • 1 1/2 tablespoons canola or vegetable oil
  • 1/3 cup white chocolate, melted
 Add peanuts to a food processor and blend until a thick nut butter forms. Stream in oil and vanilla with the processor on, continuing to run it until te mixture is smooth-about 3-5 minutes. Turn off processor, add melted chocolate, and turn processor back on. Blend until smooth.

You can keep at room temperature for about a week, but refrigerate if you want to keep it for a few weeks.

Thursday, April 21, 2011

Easter Coconut Cupcakes


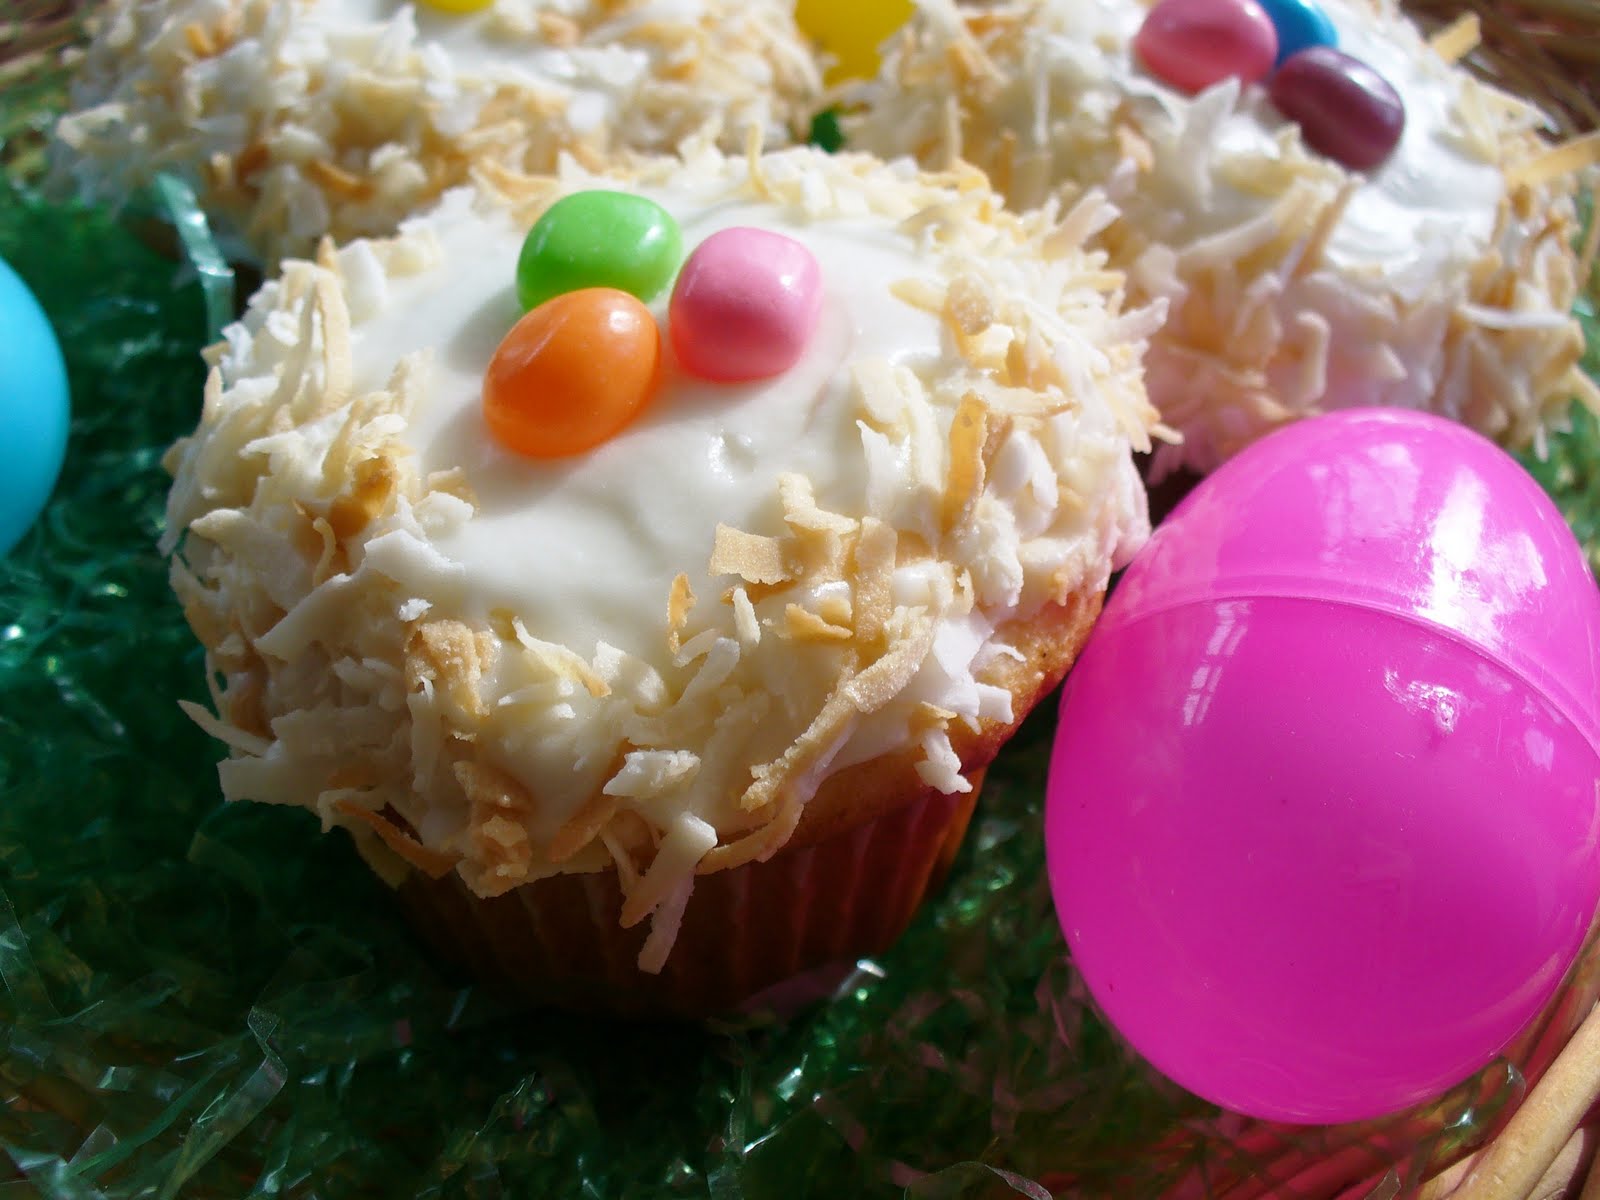
With Easter just a couple of days away, I wanted to make an Easter inspired Cupcake to share with you! I whipped up these adorable little bird's nest Coconut Cupcakes that are super simple and yummy! All you do is dress up a white cake mix with a little coconut milk and top the cupcakes off with a sweet, creamy, white coconut frosting. Then you roll the edges in toasted coconut for the nest and top them with jelly beans for the eggs! Aren't they just adorable? They are perfect for any Easter festivities you have going on this weekend! Enjoy :) 

Coconut Cupcakes: (adapted from Paula Deen)

1 (18.25-ounce) box classic white cake mix
1/2 cup water
1/2 cup coconut milk
1/3 cup vegetable oil
3 large eggs
Coconut Frosting (recipe follows)
1 1/2 cups toasted coconut
-jelly beans

1. Preheat oven to 350 degrees. Line 2 (12 cup) muffin pans with paper liners (I got 18 cupcakes).

2. In a large bowl, combine cake mix, water, milk, oil, and eggs. Beat at low speed with an electric mixer for 1 minute. Increase speed to medium, and beat for 2 minutes, or until smooth. Spoon batter evenly into prepared muffin cups, about 2/3 full. Bake 18 minutes, or until a wooden pick inserted in center comes out clean. Let cool in pan for 10 minutes. Remove from pans, and cool completely on wire rack.

3. Spread Coconut Frosting evenly over each cupcake. Roll edges in toasted coconut and place 3 jelly beans on each cupcake.

Coconut Frosting:
1/2 cup butter, softened
1/2 cup coconut milk
4 cups powdered sugar
1/2 teaspoon coconut extract
additional milk, if needed

In a large bowl, beat butter and milk at medium speed with an electric mixer until combined. Gradually beat in confectioner's sugar until smooth-if frosting is too stiff add a little milk. Stir in coconut extract.


Tuesday, April 19, 2011

Cinnamon Roll Sugar Cookies


I am back with an incredibly easy, tasty, and addictive little Cinnamon Roll Sugar Cookie recipe that I think you will love! I got this great idea from Picky Palate, and if you love cinnamon rolls, then you will absolutely adore these! The ingredient list is short and sweet-all you need for these is a roll of refrigerated sugar cookie dough, a little butter, cinnamon, sugar, and then you make a simple glaze with powdered sugar and milk! How easy, right? Give these babies a try!

Cinnamon Roll Sugar Cookies:

For the cookies:
-1 roll, (16.5 oz.) refrigerated sugar cookie dough, softened to room temperature
-2 tablespoons butter, melted
-1 tablespoon cinnamon
-1/2 cup brown sugar

For the glaze:
-powdered sugar
-milk

Directions:
Preheat oven to 350 degrees.

Roll out cookie dough into about a 12x5-inch rectangle on a floured surface. Pour and spread melted butter all over the dough. Sprinkle with cinnamon and then sugar. Roll the dough into a log. Cut into 20 equal pieces. 

Place on a baking sheet and bake for 10-12 minutes, or until lightly golden on the edges. 

Remove from oven and let cool slightly. 

Meanwhile make the glaze: mix together powdered sugar and milk to desired consistency. Drizzle over cookies and enjoy! 


Wednesday, June 1, 2011

Homemade Restaurant Style Salsa


This salsa is so good and it tastes just like the salsa that you get at authentic Mexican restaurants served with tortilla chips. It is full of fresh flavors; it consists of  canned whole tomatoes, rotel (tomatoes and chiles), fresh onion, garlic, jalapeno, and cilantro, fresh lime juice, salt, pepper, and cumin. It also couldn't be easier to make! All you do is throw everything into a food processor and pulse until your desired consistency; you can make it as chunky or as smooth as you like. Enjoy.

Homemade Restaurant Style Salsa: (Brown Eyed Baker)
Yield: About 6 cups

  • 28-ounce can whole tomatoes (peeled) with juice
  • 2 10-ounce cans Rotel (diced tomatoes with green chiles)
  • 1/4 cup chopped onion 
  • 1 clove garlic, chopped
  • 1 jalapeno, quartered and sliced thin
  • 1/2 cup cilantro
  • Juice from 1/2 a fresh lime
  • 1/4 teaspoon salt
  • 1/4 teaspoon granulated sugar
  • 1/4 teaspoon ground cumin
Add all ingredients to a food processor. Pulse until you get desired consistency. Refrigerate for at least one hour, and serve with your favorite tortilla chips.

*Notes*: This makes a large quantity so use at least an 11-cup food processor, or work in batches. If you prefer a milder salsa, remove the seeds and membrane from the jalapeno before adding it to the food processor.


Tuesday, May 31, 2011

A Summer Treat


I don't know if there is an acual name for these delighful sweet treats, but, I am going to call them graham cracker sandwich cookies (I know, it's a pretty lame name, but I coudn't think of anything else)! And, I am sure that you have had one before because of their simplicity and tastiness. And if you have never had one, let me just tell you that graham crackers and frosting pair so well together, especially with a glass of cold milk!


These sweet treats remind me of hot summer days when I was little. My mom would make them for us to the take to the beach or on a picnic, we would eat them on vacation, and I remember always eating them while watching fireworks on the 4th of July, with blue frosting of course! I absolutely loved, loved, loved them and I still do. I really like when the graham cracker gets slighly soft from sandwiching the frosting :) These are great to make with any leftover frosting that you have, which is what I did with these. They are also a simple and fun sweet snack to whip up and kids will gobble them up, enjoy!


Graham Cracker Sandwich Cookies:

All you need is:
  • Graham Crackers
  • Your Favorite Frosting
  • Sprinkles
Break gramham cracker sheet into two halves. Frost one half with desired amount of frosting. Place the other half of the graham cracker on top to form a sandwich. Dip edges in sprinkles. Store in an airtight container (these are best eaten the day they are made).


Monday, May 30, 2011

S'more Cookie Bars


Happy Memorial Day! I have the perfect treat to kick off the start of summer, S'more Cookie Bars! I love campfire s'mores, but these bars sure step those up a bit! You have HERSHEY'S chocolate bars and marshmallow creme sandwiched between a blondie-like graham cracker cookie bar! You have to let them cool before cutting, but, I think they taste best warmed in the microwave to get the sticky, gooey, and metly effect of a s'more.     


S'more Cookie Bars: (Hershey's)

  • 1/2 cup (1 stick) butter or margarine, softened
  • 3/4 cup sugar
  • 1 egg
  • 1 teaspoon vanilla extract
  • 1-1/3 cups all-purpose flour
  • 3/4 cup graham cracker crumbs
  • 1 teaspoon baking powder
  • 1/4 teaspoon salt
  • 4 (1.55 oz. each) or 2 King Size HERSHEY'S Milk Chocolate Bars
  • 1 cup marshmallow creme (I used closer to 1-1/2 cups)
Heat oven to 350 degrees. Line a 8x8-inch baking pan with foil and spray with non-stick cooking spray.

Beat butter and sugar in a large bowl until light and fluffy. Add egg and vanilla; beat well. Stir together flour, graham cracker crumbs, baking powder, and salt; add to butter mixture, beating until blended. Press half of the dough into prepared pan.

Arrange chocolate bars over dough. Spread evenly with marshmallow creme. Scatter bits of remaining dough over marshmallow; carefully press to form a layer.

Bake 30-35 minutes or until lightly browned. Cool completely in pan on wire rack. Cut into bars.  


Tuesday, May 24, 2011

Peanut Butter & Jelly Cookies


Peanut butter and jelly sandwiches are a classic childhood favorite, packed in many lunch boxes over the years. I still love to eat PB&J's now! And what's not to love about a classic PB&J?  They are the perfect combination of creamy and salty peanut butter and sweet jelly sandwiched between two slices of soft bread. This cookie is the perfect treat for any PB&J lover. These jumbo-sized peanut butter cookies are soft and chewy and filled with a center of your favorite sweet jelly. Enjoy!   

Peanut Butter & Jelly Cookies: (peanut butter cookies adapted from Elle's New England Kitchen & idea from Giada)

  • 2 1/2 cups all purpose flour
  • 1 teaspoon baking powder
  • 1/2 teaspoon baking soda
  • 1/2 teaspoon salt
  • 3/4 butter, softened
  • 1/4 cup shortening
  • 1 cup granulated sugar, plus 1/4 cup
  • 1 cup brown sugar
  • 2 large eggs
  • 1 teaspoon vanilla extract
  • peanut butter mixture, see below
  • 1 cup peanut butter chips
  • about 1/2 cup of your favorite jam/jelly

Peanut Butter Mixture

  • 8 oz. peanut butter
  • 2 oz. (1/2 stick butter), softened
  • 2 oz. honey
Heat oven to 350 degrees. Line baking sheets with parchment paper and set aside. Make the peanut butter mixture by combining all of the ingredients. Set aside.

In a medium bowl, mix flour, baking powder, baking soda, and salt, set aside. In a standing mixer or large bowl, cream the 3/4 butter, shortening, and both sugars until light and fluffy. Add the eggs, one at a time, beating well after each addition, then add the vanilla and peanut butter mixture. Add the flour mixture by the cupful and beat at low speed until fully mixed. Stir in the peanut butter chips.

Put the remaining 1/4 of sugar in a small bowl. Form the dough into 1/4 cup-size balls and roll in sugar. Arrange 5 balls of dough, evenly apart, on prepared baking sheets. Using a round 1/4 teaspoon measure, or the thin end of a wooden spoon, make a hole in the center of each ball of dough, about 1/2 to 3/4-inch deep. Spoon about 1 teaspoon jam into each hole. Bake for 11-14 minutes until the dough has spread and the surface of the cookies are crackled. Cool for 5 minutes and transfer to a wire rack to cool completely, about 20 minutes. Serve or store in an airtight container. 


Tuesday, May 17, 2011

Homemade White Chocolate Peanut Butter


Woo hoo!!! School is finally out for the summer and I am soooo ready for a break! 


Summer is my favorite season ever! I sometimes wish that I lived somewhere where it was warm year-round, like Hawaii, oh how I would love living in a tropical place! Although, I must admit, I would miss the snow on Christmas. But anywho, what do I love about summer? I love the heat, the beautiful sunshine, sleeping with my window open and falling asleep to the sound of crickets, the fresh and delicious fruit, shorts, flip flops, summer dresses, going barefoot, summer vacations, and cookouts, and basically everything else about summer! Best of all, it means that I will have more time for baking and blogging and sharing yummy recipes with you!


I never knew that making homemade peanut butter was so easy. All you need is a few simple ingredients and a couple of minutes and you will have whipped yourself up some gourmet peanut butter with endless possibilities! You can basically add anything you want into the peanut butter mixture to create your own peanut butter concoction. You could add honey, melted milk chocolate, melted butterscotch chips, caramel, or may I suggest trying this fabulous looking Cookies and Cream Peanut Butter, from Picky Palate that I want to just dive right into! Doesn't that look delicious?!

This peanut butter is great for dipping apples and pretzals into or slathering on toast and bagels. Try it out and let me know what flavors you come up with!

Homemade White Chocolate Peanut Butter: (How Sweet It Is)
makes about 3/4 cup
  • 1 1/2 cups dry, roasted peanuts (I used salted)
  • 1 teaspoon vanilla extract
  • 1 1/2 tablespoons canola or vegetable oil
  • 1/3 cup white chocolate, melted
 Add peanuts to a food processor and blend until a thick nut butter forms. Stream in oil and vanilla with the processor on, continuing to run it until te mixture is smooth-about 3-5 minutes. Turn off processor, add melted chocolate, and turn processor back on. Blend until smooth.

You can keep at room temperature for about a week, but refrigerate if you want to keep it for a few weeks.

Thursday, April 21, 2011

Easter Coconut Cupcakes


With Easter just a couple of days away, I wanted to make an Easter inspired Cupcake to share with you! I whipped up these adorable little bird's nest Coconut Cupcakes that are super simple and yummy! All you do is dress up a white cake mix with a little coconut milk and top the cupcakes off with a sweet, creamy, white coconut frosting. Then you roll the edges in toasted coconut for the nest and top them with jelly beans for the eggs! Aren't they just adorable? They are perfect for any Easter festivities you have going on this weekend! Enjoy :) 

Coconut Cupcakes: (adapted from Paula Deen)

1 (18.25-ounce) box classic white cake mix
1/2 cup water
1/2 cup coconut milk
1/3 cup vegetable oil
3 large eggs
Coconut Frosting (recipe follows)
1 1/2 cups toasted coconut
-jelly beans

1. Preheat oven to 350 degrees. Line 2 (12 cup) muffin pans with paper liners (I got 18 cupcakes).

2. In a large bowl, combine cake mix, water, milk, oil, and eggs. Beat at low speed with an electric mixer for 1 minute. Increase speed to medium, and beat for 2 minutes, or until smooth. Spoon batter evenly into prepared muffin cups, about 2/3 full. Bake 18 minutes, or until a wooden pick inserted in center comes out clean. Let cool in pan for 10 minutes. Remove from pans, and cool completely on wire rack.

3. Spread Coconut Frosting evenly over each cupcake. Roll edges in toasted coconut and place 3 jelly beans on each cupcake.

Coconut Frosting:
1/2 cup butter, softened
1/2 cup coconut milk
4 cups powdered sugar
1/2 teaspoon coconut extract
additional milk, if needed

In a large bowl, beat butter and milk at medium speed with an electric mixer until combined. Gradually beat in confectioner's sugar until smooth-if frosting is too stiff add a little milk. Stir in coconut extract.


Tuesday, April 19, 2011

Cinnamon Roll Sugar Cookies


I am back with an incredibly easy, tasty, and addictive little Cinnamon Roll Sugar Cookie recipe that I think you will love! I got this great idea from Picky Palate, and if you love cinnamon rolls, then you will absolutely adore these! The ingredient list is short and sweet-all you need for these is a roll of refrigerated sugar cookie dough, a little butter, cinnamon, sugar, and then you make a simple glaze with powdered sugar and milk! How easy, right? Give these babies a try!

Cinnamon Roll Sugar Cookies:

For the cookies:
-1 roll, (16.5 oz.) refrigerated sugar cookie dough, softened to room temperature
-2 tablespoons butter, melted
-1 tablespoon cinnamon
-1/2 cup brown sugar

For the glaze:
-powdered sugar
-milk

Directions:
Preheat oven to 350 degrees.

Roll out cookie dough into about a 12x5-inch rectangle on a floured surface. Pour and spread melted butter all over the dough. Sprinkle with cinnamon and then sugar. Roll the dough into a log. Cut into 20 equal pieces. 

Place on a baking sheet and bake for 10-12 minutes, or until lightly golden on the edges. 

Remove from oven and let cool slightly. 

Meanwhile make the glaze: mix together powdered sugar and milk to desired consistency. Drizzle over cookies and enjoy!